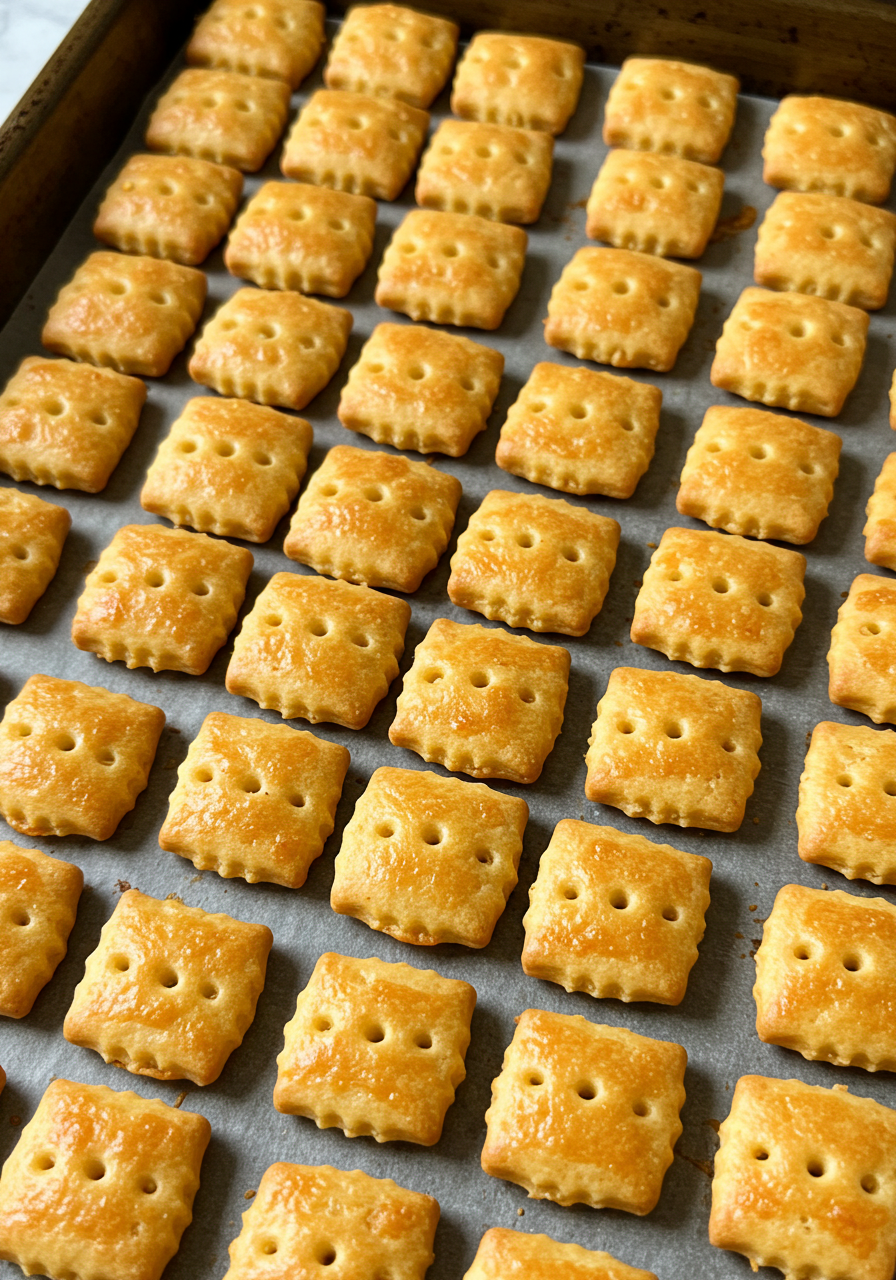
Craving a crunchy, cheesy snack that’s even better than the store-bought version? These Homemade Cheez-Its are crisp, buttery, and loaded with real cheddar cheese flavor. With just a few simple ingredients, you can make this irresistible snack right in your own kitchen—perfect for movie nights, lunchboxes, or anytime you need a savory bite.
Want recipes like this delivered straight to your inbox? Subscribe now to get the latest culinary creations you’ll love.
Why You’ll Love This Recipe
- Real Ingredients – No preservatives or additives—just real cheese and pantry staples.
- Crisp & Cheesy – Just like the classic snack but even tastier and fresher.
- Easy to Make – Simple steps, no fancy tools needed.
- Kid-Approved – Fun to make and even more fun to eat!
- Great for Gifting – Package them up for a thoughtful homemade snack.
Ingredients You’ll Need
- 1½ cups sharp cheddar cheese, finely shredded
- 4 tbsp unsalted butter, cold and cubed
- ¾ cup all-purpose flour
- ½ tsp salt
- ½ tsp garlic powder (optional, for extra flavor)
- 2–3 tbsp ice water
Tools You’ll Need
- Food processor or pastry cutter
- Rolling pin
- Parchment paper or silicone baking mat
- Baking sheet
- Pizza cutter or knife
- Fork or skewer for poking holes
Step-by-Step Instructions
Step 1: Make the Dough
- In a food processor, combine the shredded cheddar cheese, cold butter, flour, salt, and garlic powder (if using).
- Pulse until the mixture resembles coarse crumbs.
- Add ice water 1 tablespoon at a time, pulsing until a dough just comes together.
- Shape the dough into a flat disk, wrap in plastic, and chill for at least 1 hour.
Step 2: Roll & Cut
5. Preheat your oven to 375°F (190°C).
6. Roll the chilled dough out between two sheets of parchment paper to about 1/8-inch thick.
7. Use a pizza cutter or knife to cut into 1-inch squares.
8. Transfer squares to a parchment-lined baking sheet, spacing them slightly apart.
9. Use a skewer or fork to poke a small hole in the center of each square (just like real Cheez-Its!).
Step 3: Bake Until Crisp
10. Bake for 12–15 minutes or until golden and puffed.
11. Watch closely—edges can brown quickly toward the end.
12. Let them cool completely on the baking sheet for maximum crispness.
Tips for Perfect Homemade Cheez-Its
- Use Sharp Cheese – The sharper the cheddar, the bolder the flavor.
- Don’t Overwork the Dough – Stop mixing once it comes together to avoid tough crackers.
- Chill the Dough – This helps the crackers hold their shape and bake evenly.
- Roll Thin & Even – The thinner the dough, the crispier the cracker.
- Store Properly – Keep them in an airtight container to stay fresh and crunchy.
Flavor Variations
- Spicy Cheez-Its: Add a pinch of cayenne or chili powder to the dough.
- Herbed Cheez-Its: Mix in dried thyme, rosemary, or Italian seasoning.
- Parmesan Twist: Replace ½ cup of cheddar with grated Parmesan for a tangy kick.
- Whole Wheat Version: Use whole wheat flour for a nuttier, heartier snack.
Serving Suggestions
- Cheese Boards – Add a homemade touch to charcuterie spreads.
- Lunchbox Snack – A wholesome treat for kids and adults alike.
- Soup Topper – Use in place of croutons in tomato soup or chili.
- Game Day Snack – Serve in bowls with dips like hummus or guacamole.
How to Store & Freeze
Storing:
- Keep crackers in an airtight container at room temperature for up to 1 week.
- Add a paper towel to absorb any moisture and keep them crisp.
Freezing:
- Freeze the dough disk for up to 2 months. Thaw in the fridge overnight before rolling out.
- Baked crackers are best fresh, so freezing them after baking isn’t recommended.
Frequently Asked Questions
- Can I use pre-shredded cheese?
Freshly shredded cheese melts and blends better, but pre-shredded will work in a pinch. - What if I don’t have a food processor?
You can use a pastry cutter or even your hands to cut the butter into the flour. - Can I use different types of cheese?
Yes! Try Monterey Jack, Pepper Jack, or Gouda for fun flavor swaps. - Can I make this recipe gluten-free?
Use a 1:1 gluten-free flour blend and check that your cheese is gluten-free too. - Why do I need to poke holes in the crackers?
It prevents puffing during baking and gives them the classic Cheez-It look.
Final Thoughts
These Homemade Cheez-Its are the ultimate DIY snack—flaky, crunchy, and loaded with real cheddar flavor. Whether you’re making them for a family movie night, prepping snacks for the week, or just want a better version of your favorite store-bought cracker, this recipe delivers on every level. Once you try these, you might never go back to the box again.
Give them a try and let me know what you think! Don’t forget to share your baking creations—I’d love to see your homemade snack game in action.
Preparation Time: 10 minutes (+1 hour chill time)
Cooking Time: 15 minutes
Cuisine: American
Nutritional Information (Per Serving – About 10 crackers):
Calories: 160 | Protein: 4g | Carbohydrates: 12g | Fat: 11g | Fiber: 1g | Sodium: 180mg

Homemade Cheez-Its
- Total Time: 25 minutes
Description
Craving a crunchy, cheesy snack that’s even better than the store-bought version? These Homemade Cheez-Its are crisp, buttery, and loaded with real cheddar cheese flavor. With just a few simple ingredients, you can make this irresistible snack right in your own kitchen—perfect for movie nights, lunchboxes, or anytime you need a savory bite.
Want recipes like this delivered straight to your inbox? Subscribe now to get the latest culinary creations you’ll love.
Ingredients
-
1½ cups sharp cheddar cheese, finely shredded
-
4 tbsp unsalted butter, cold and cubed
-
¾ cup all-purpose flour
-
½ tsp salt
-
½ tsp garlic powder (optional, for extra flavor)
-
2–3 tbsp ice water
Instructions
Step 1: Make the Dough
-
In a food processor, combine the shredded cheddar cheese, cold butter, flour, salt, and garlic powder (if using).
-
Pulse until the mixture resembles coarse crumbs.
-
Add ice water 1 tablespoon at a time, pulsing until a dough just comes together.
-
Shape the dough into a flat disk, wrap in plastic, and chill for at least 1 hour.
Step 2: Roll & Cut
5. Preheat your oven to 375°F (190°C).
6. Roll the chilled dough out between two sheets of parchment paper to about 1/8-inch thick.
7. Use a pizza cutter or knife to cut into 1-inch squares.
8. Transfer squares to a parchment-lined baking sheet, spacing them slightly apart.
9. Use a skewer or fork to poke a small hole in the center of each square (just like real Cheez-Its!).
Step 3: Bake Until Crisp
10. Bake for 12–15 minutes or until golden and puffed.
11. Watch closely—edges can brown quickly toward the end.
12. Let them cool completely on the baking sheet for maximum crispness.
Notes
Use Sharp Cheese – The sharper the cheddar, the bolder the flavor.
Don’t Overwork the Dough – Stop mixing once it comes together to avoid tough crackers.
Chill the Dough – This helps the crackers hold their shape and bake evenly.
Roll Thin & Even – The thinner the dough, the crispier the cracker.
Store Properly – Keep them in an airtight container to stay fresh and crunchy.
- Prep Time: 10 minutes (+1 hour chill time)
- Cook Time: 15 minutes
- Cuisine: American


