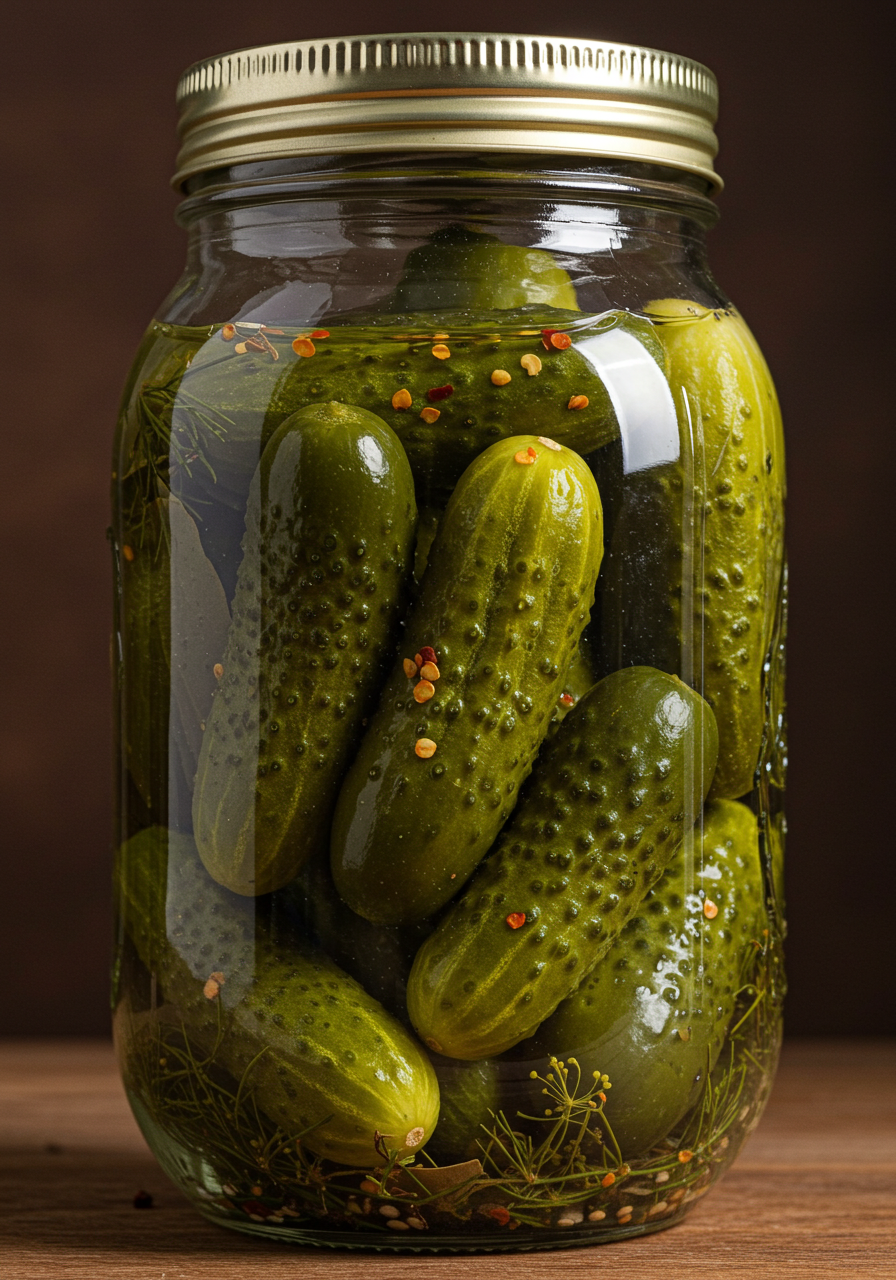
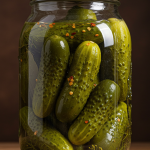
These homemade garlic dill pickles are crisp, tangy, and bursting with flavor. Perfect as a snack or as a side dish for burgers, sandwiches, or BBQs. Best of all, they’re easy to make with just a few simple ingredients and can be customized to suit your taste.
Why You’ll Love This Recipe
- Crisp & Crunchy – These pickles have a satisfying crunch with every bite.
- Flavor-Packed – Infused with the perfect balance of garlic and dill, plus a touch of heat if you like it spicy.
- Quick & Easy – No need to can or heat process; just let them sit and soak up the flavor.
- Customizable – Adjust the garlic, dill, and spice levels to your preference.
Ingredients You’ll Need
- 6-8 small cucumbers (Kirby cucumbers work best)
- 3 cups water
- 1 ½ cups white vinegar
- 2 tablespoons salt (pickling salt or kosher salt)
- 4 cloves garlic, peeled and smashed
- 1 tablespoon whole black peppercorns
- 1 tablespoon dill seeds or 3-4 sprigs fresh dill (or both)
- 1 teaspoon red pepper flakes (optional, for heat)
- 1 bay leaf (optional, for extra flavor)
- 1 tablespoon sugar (optional, for a slightly sweeter pickle)
Tools You’ll Need
- A large jar or a few smaller mason jars
- Small saucepan
- Knife for cutting cucumbers
How to Make Garlic Dill Pickles
Step 1: Prepare the Cucumbers
Wash the cucumbers thoroughly and slice them into rounds or spears, depending on your preference. For extra crunch, you can also soak the cucumbers in ice water for 1 hour before pickling.
Step 2: Make the Pickling Brine
In a small saucepan, combine water, vinegar, salt, and sugar (if using). Bring to a boil over medium-high heat, stirring until the salt and sugar dissolve. Once the brine is boiling, remove from heat and let it cool slightly.
Step 3: Pack the Jars
Place the garlic cloves, dill, peppercorns, red pepper flakes (if using), and bay leaf (if using) into a clean jar or mason jar. Pack the sliced cucumbers tightly into the jar.
Step 4: Pour the Brine
Carefully pour the warm brine over the cucumbers, ensuring that they are fully submerged. Leave about ½ inch of space at the top of the jar.
Step 5: Seal & Refrigerate
Seal the jar with a lid and let it cool to room temperature. Once cooled, place the jar in the refrigerator. Allow the pickles to sit for at least 24-48 hours before eating for the best flavor, though they will get more flavorful the longer they sit.
Step 6: Serve & Enjoy!
Serve your homemade garlic dill pickles chilled as a snack or a tangy side dish!
What to Serve With Garlic Dill Pickles
- Sandwiches – These pickles are perfect for adding to a classic deli sandwich, a burger, or a grilled cheese.
- Charcuterie Board – Add these pickles to a platter of meats, cheeses, and crackers for a salty, tangy contrast.
- Salads – Chop them up and add them to a fresh salad for a crunchy bite.
Tips for Success
- Choose firm cucumbers – The key to a good pickle is starting with fresh, firm cucumbers. Opt for pickling cucumbers or small Kirby cucumbers for the best texture.
- Customize your spices – Feel free to experiment with different spices like mustard seeds, coriander, or even a little turmeric for unique flavor.
- For extra crispness – Add a few grape leaves or a small piece of dill flower to the jar to help keep the pickles extra crunchy.
Storing & Reheating
- Refrigerate – Keep your pickles in the refrigerator, where they’ll stay fresh for up to 2-3 weeks.
- Make-Ahead – The longer the pickles sit in the brine, the more flavorful they will become, so they’re perfect for making ahead of time.
Frequently Asked Questions
Can I make these pickles spicy? Yes! Add more red pepper flakes or even sliced jalapeños to the jar for a spicy kick.
How long do these pickles last? These pickles will last about 2-3 weeks in the refrigerator. Make sure to store them in an airtight container.
Can I use other types of cucumbers? Yes, you can use any type of cucumber you prefer, though the smaller, firm varieties work best for pickling.
Conclusion
These garlic dill pickles are the perfect balance of crunch, tang, and savory flavor. Easy to make and so much better than store-bought, they’ll quickly become a favorite in your home!
Preparation Time: 15 minutes
Cooking Time: 5 minutes (for the brine)
Cuisine: American, Pickling
Nutritional Information (Per Serving):
Calories: 5 | Protein: 0g | Carbohydrates: 1g | Fat: 0g | Sodium: 150mg
Garlic Dill Pickles
- Total Time: 20 minutes
Description
These homemade garlic dill pickles are crisp, tangy, and bursting with flavor. Perfect as a snack or as a side dish for burgers, sandwiches, or BBQs. Best of all, they’re easy to make with just a few simple ingredients and can be customized to suit your taste.
Subscribe to our newsletter to get this recipe delivered straight to your inbox and never miss out on delicious updates.
Ingredients
- 6–8 small cucumbers (Kirby cucumbers work best)
- 3 cups water
- 1 ½ cups white vinegar
- 2 tablespoons salt (pickling salt or kosher salt)
- 4 cloves garlic, peeled and smashed
- 1 tablespoon whole black peppercorns
- 1 tablespoon dill seeds or 3-4 sprigs fresh dill (or both)
- 1 teaspoon red pepper flakes (optional, for heat)
- 1 bay leaf (optional, for extra flavor)
- 1 tablespoon sugar (optional, for a slightly sweeter pickle)
Instructions
Wash the cucumbers thoroughly and slice them into rounds or spears, depending on your preference. For extra crunch, you can also soak the cucumbers in ice water for 1 hour before pickling.
In a small saucepan, combine water, vinegar, salt, and sugar (if using). Bring to a boil over medium-high heat, stirring until the salt and sugar dissolve. Once the brine is boiling, remove from heat and let it cool slightly.
Place the garlic cloves, dill, peppercorns, red pepper flakes (if using), and bay leaf (if using) into a clean jar or mason jar. Pack the sliced cucumbers tightly into the jar.
Carefully pour the warm brine over the cucumbers, ensuring that they are fully submerged. Leave about ½ inch of space at the top of the jar.
Seal the jar with a lid and let it cool to room temperature. Once cooled, place the jar in the refrigerator. Allow the pickles to sit for at least 24-48 hours before eating for the best flavor, though they will get more flavorful the longer they sit.
Serve your homemade garlic dill pickles chilled as a snack or a tangy side dish!
Notes
- Choose firm cucumbers – The key to a good pickle is starting with fresh, firm cucumbers. Opt for pickling cucumbers or small Kirby cucumbers for the best texture.
- Customize your spices – Feel free to experiment with different spices like mustard seeds, coriander, or even a little turmeric for unique flavor.
- For extra crispness – Add a few grape leaves or a small piece of dill flower to the jar to help keep the pickles extra crunchy.
- Prep Time: 15 minutes
- Cook Time: 5 minutes (for the brine)
- Cuisine: American